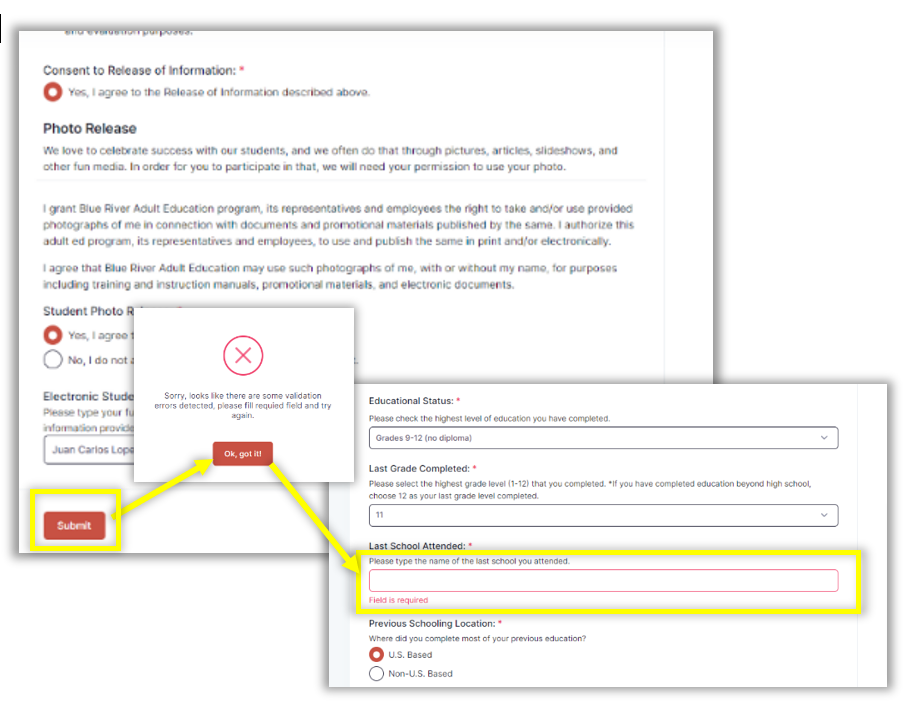
Step 2: Registration Form
If a student skips over a required field on the registration form, when he/she tries to submit the form, an error message will appear and the student will be prompted to correct it. The missing fields will be highlighted in red, as shown in this sample.